TruelySell Android - Documentation
1. Introduction
- Created on: 16 October 2023
- Developed by: Dreams Technologies
- Support via email: [email protected]
- Support via CodeCanyon: Take me there
TruelySell provides a multiple on demand service based on nearby locations, by using this app simply you view and book a service or provide a service to the customers.
TruelySell is an on demand nearby service finder and booking system, it’s very powerful, flexible and most affordable that can be used for multiple type business. Truly sell Service offers a bouquet of services like pest control, carpentry, housekeeping, kitchens repairing, lighting, painting, wooden work, plumbing, refrigeration and washing machine repair and cleaning, air-conditioning repair and maintenance, and electrical services. It’s fully responsive, easy to use and user friendly applications.
TruelySell can be used in multiple ways, it has a multiple category and subcategories list. Customers can book a service within a minute based on your convenient time. Payment can be collected through stripe. If you are looking for any other payment gateways it can be under customizations.
2. Product Features
- Package contains Web, Android, and iOS platforms
- Professional Design on Web and Mobile Apps
- Subscription based App usage option
- OTP Based Login
- Ingrate with Firebase for push notification
- Simple and Powerful Chat Option
- Fully Responsive
- Powerful Admin Panel
- Add Multiple Service
- Add/Edit/delete Service details
- Dynamic Pricing
- Simple Calendar and Time view
- Powerful Location based Service
- Easy and user friendly Admin panel
- History view option
- Multiple Payment gateways
- Wallet concept
- And Much More....
3. Installation Procedure for Android App
Android (Android Studio)
1. Download Android Studio if you still don't have follow the below link: https://developer.android.com/studio/index.html
2. While installing Android studio, it will ask to import the Java Development Kit. If you already have that file, you can select it from the directory. Otherwise you can download it from the link below. http://download.cnet.com/Java-Development-Kit-64-Bit/3000-2218_4-75317068.html
3. Run the Android Studio, open project (select root folder, example Android), this can take some time
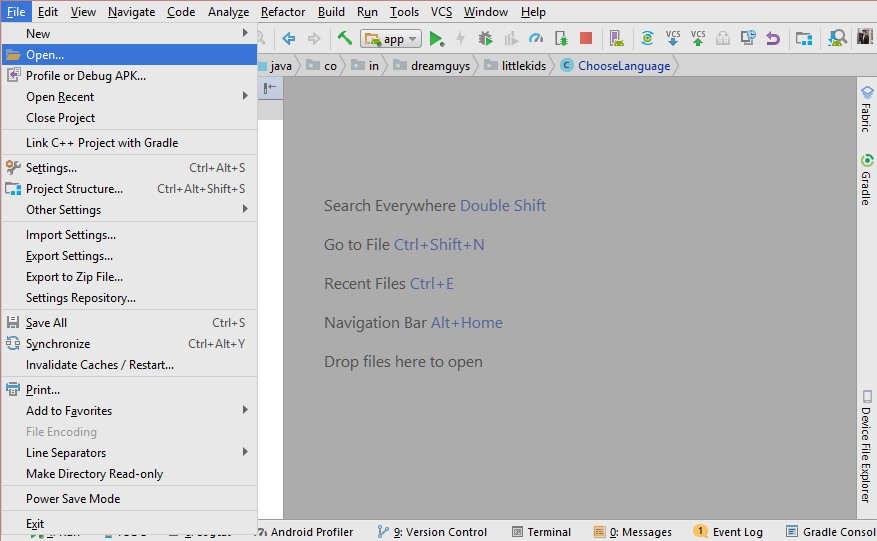
4. To open an existing project, click File > Open. File directory will be opened. From here you can choose the location of the project and click OK
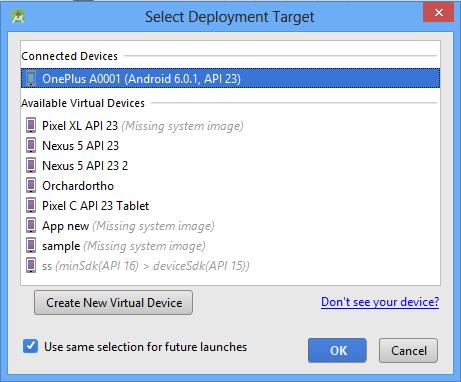
To build and run your app, select Run in the menu bar (or click Run in the toolbar). If it's the first time running the app, Android Studio asks you to select a deployment target. Select a device to install and run your app.
4. Configuration
Change API URL
Open App> java> packagename>Utils.java> AppConstants.java> Replace your New URL in BaseURL
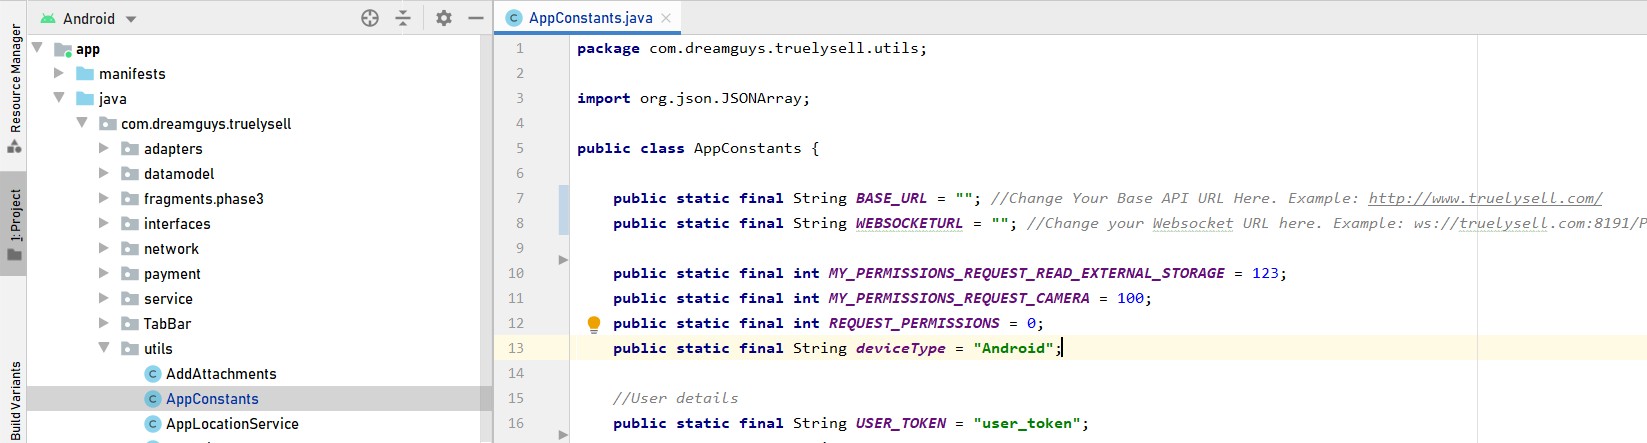
Change WebSocket URL
Open App> java> packagename>Utils.java> AppConstants.java> Replace your New URL in WEBSOCKETURL
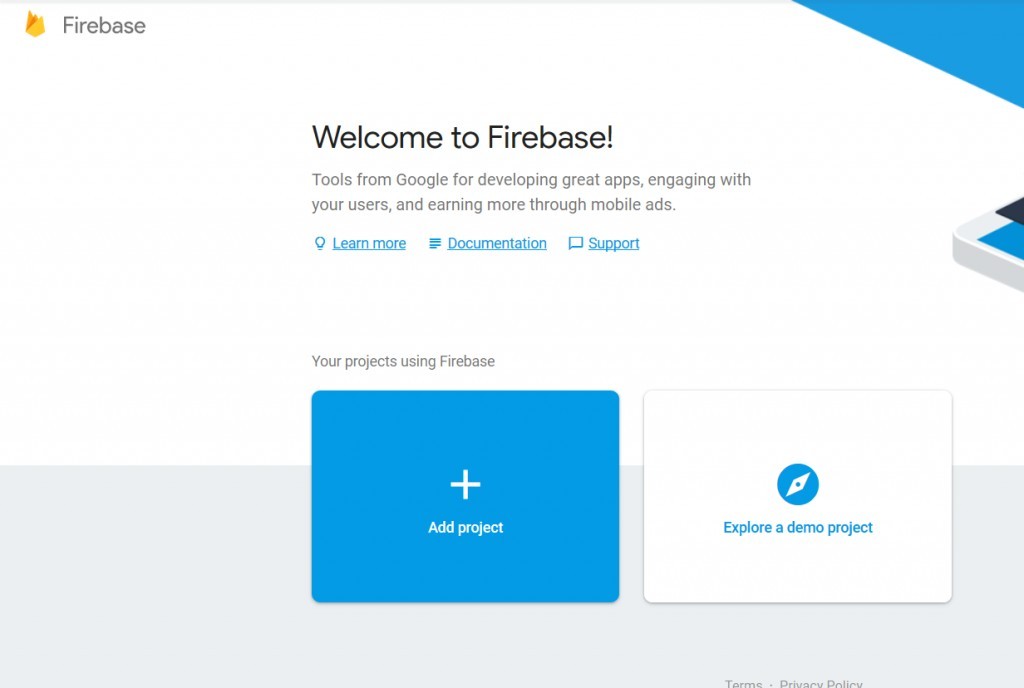
5. Configure Firebase
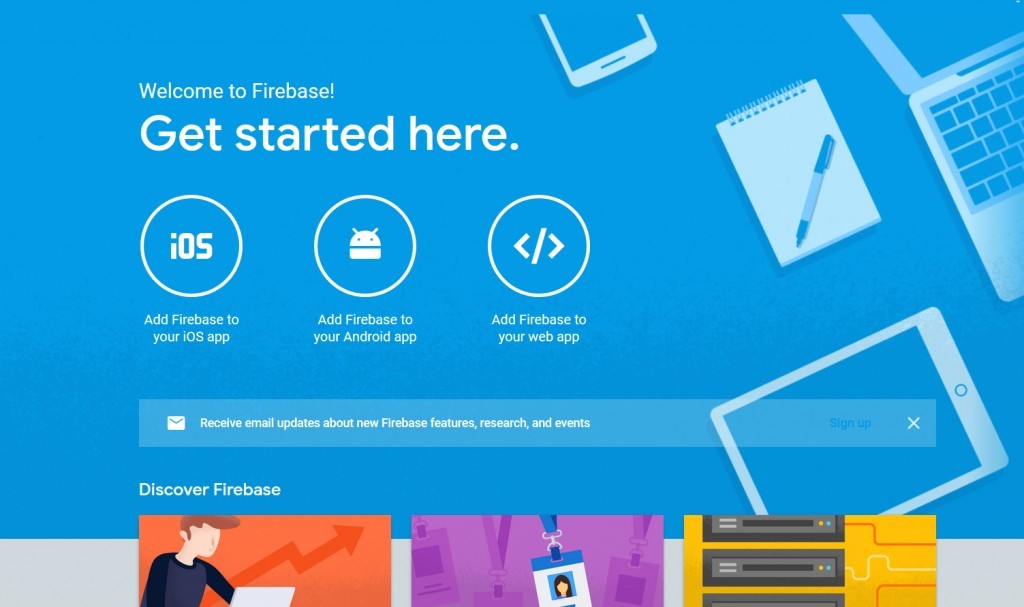
1. First navigate to the firebase website using the below URL.
2. Create a firebase project
- Create a project by clicking on create project in the firebase console.
- Fill the necessary details in the pop up window about the project. Edit the project ID if required.

- Fill the necessary details in the pop up window about the project. Edit the project ID if required.
3. Now add this project to the android app
- Click on the Add firebase to your android app option on the starting window.
- A prompt will open where to enter the package name of the app.
- Now the app is connected to the Firebase. Now all the cloud based as well server based services can be easily used in the app.
- Now the app will be registered with firebase.
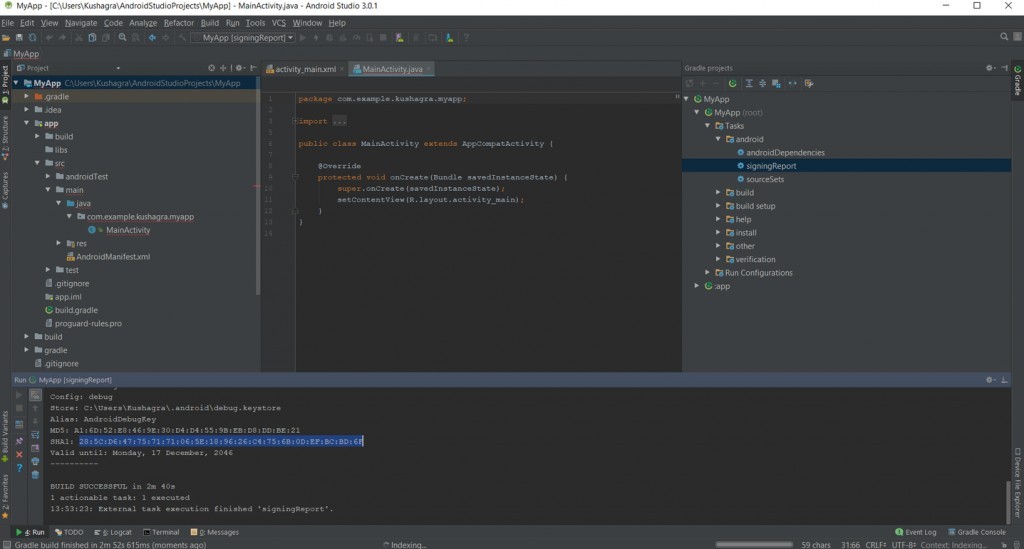
4. Also, the SHA1 certificate, can be given, of the app by following steps:
Go to android studio project
    ↳ Gradle
       ↳ Root folder
    	  ↳ Task
    	      ↳ Android
    		  ↳ SigningReport
                     ↳ Copy paste SHA1 from console
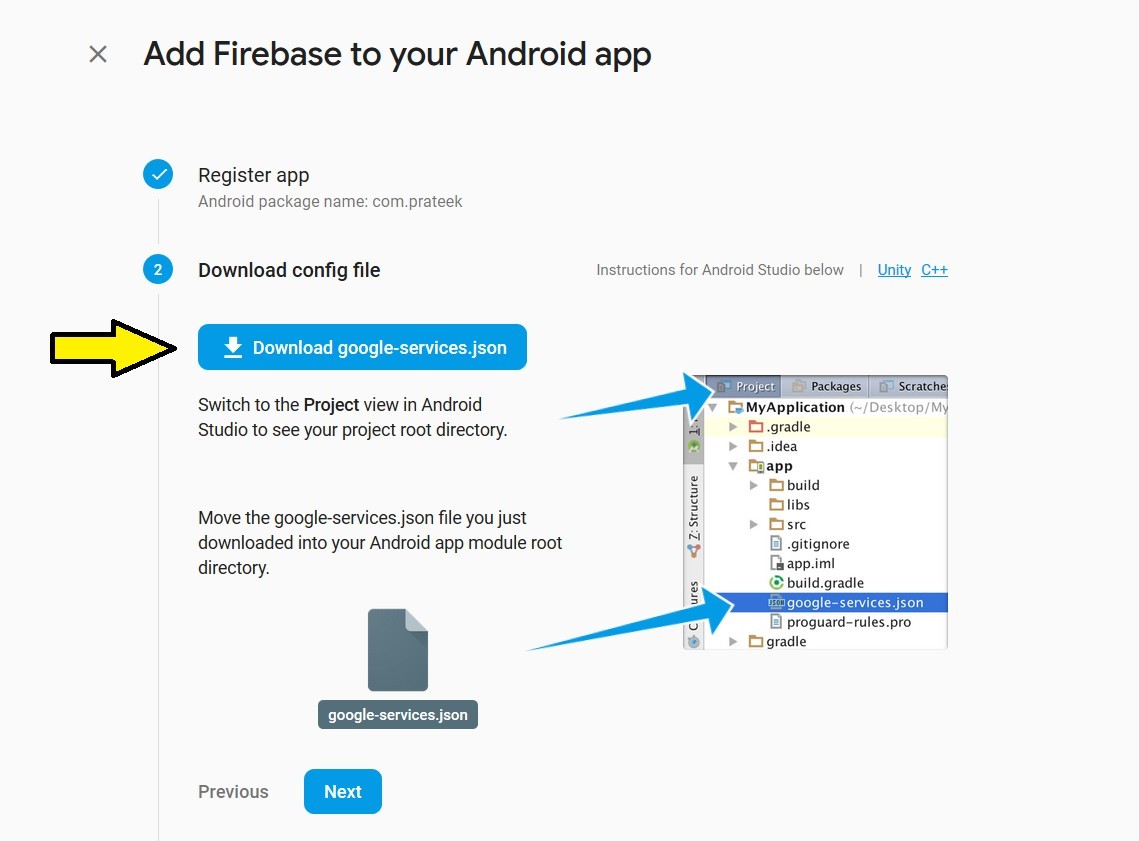
5. Now download the google-services.json file and place it in the root directory of the android app
6. Now add the following in the project
- Adding the sdk in the project.
- Add the following code to the PROJECT-LEVELbuild.gradle of the app.
buildscript {
    dependencies {
       classpath 'com.google.gms:google-services:4.0.0'
    }
}
- Add the following code to APP-LEVEL build.gradle of the app.
dependencies {
    implementation 'com.google.firebase:firebase-core:16.0.0'
}
// Add to the bottom of the file
apply plugin: 'com.google.gms.google-services
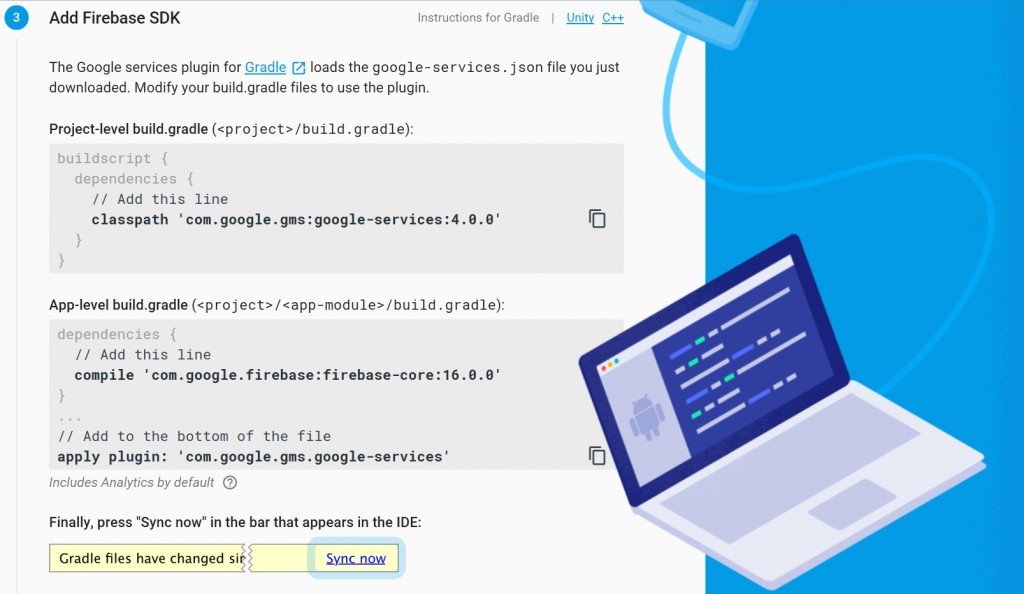
7. Now Sync the gradle by clicking on sync now.
8. After adding the above code(sdk), run the app to send the verification to the Firebase console.
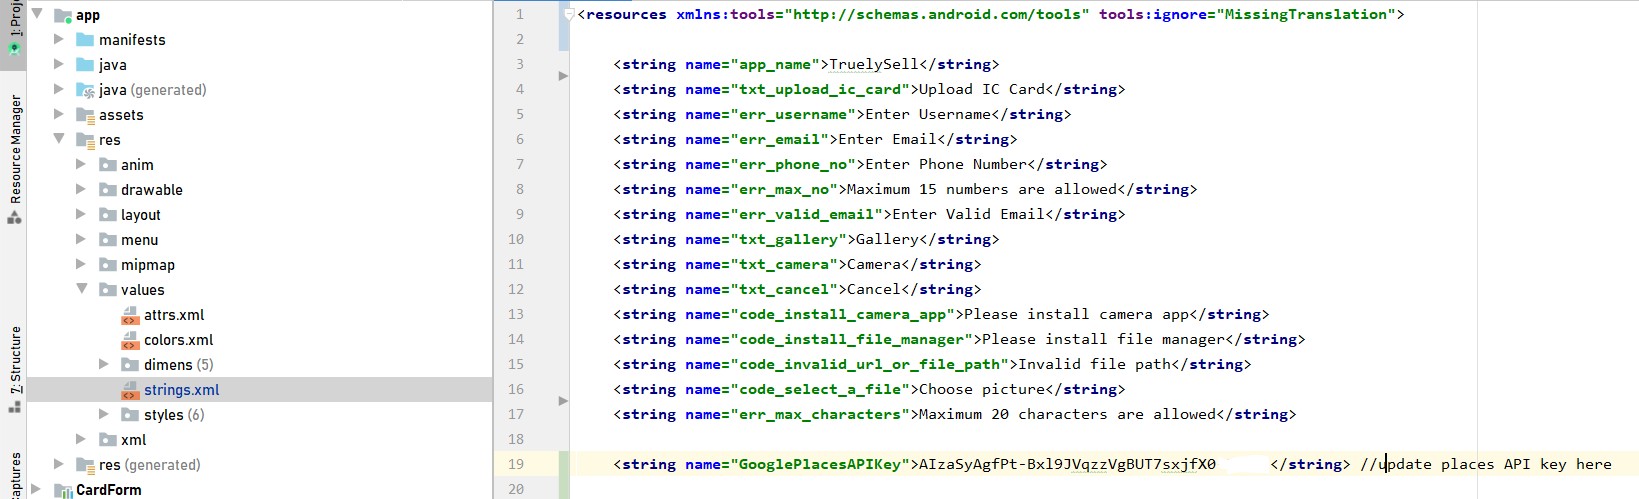
6. Change Places API Key
1. Visit the Google Cloud Platform Console.
2. Click the project drop-down and select or create the project for which you want to add an API key.
3. Click the menu button and select APIs & Services > Credentials.
4. On the Credentials page, click Create credentials > API key. The API key created dialog displays your newly created API key.
5. Click Close.
The new API key is listed on the Credentials page under API keys.
(Remember to restrict the API key before using it in production.)
To change the places api Key, navigate to res>values>Strings.xml> GooglePlacesAPIKey > change the key here.
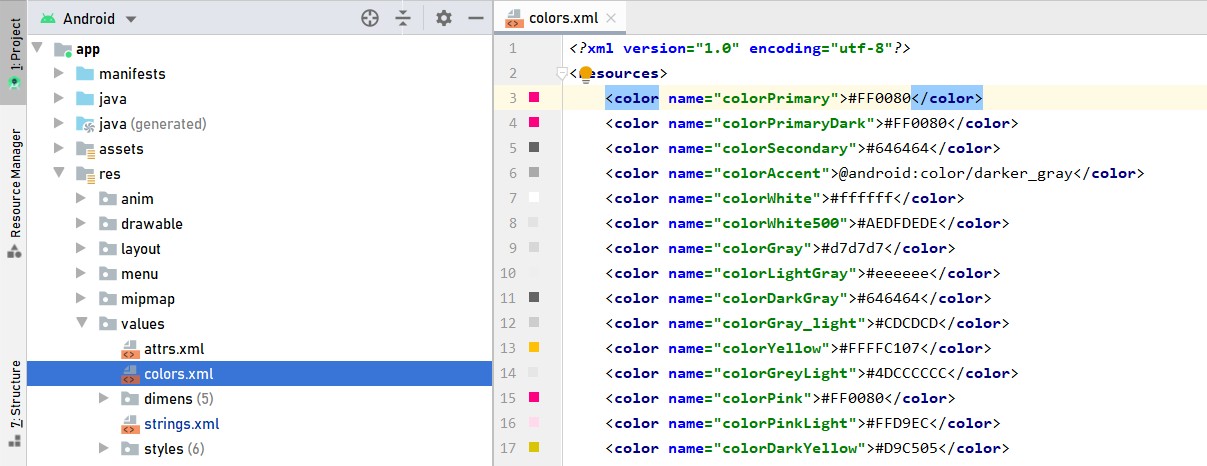
7. Change Color
To change the color of the app, select res -> values -> colors. From this file, you can change the color of the app. If you change the color here, the whole application color will be changed.
8. Change Text Values
To change Text values in the application, select res -> values -> strings. From this file, you can change the string values. If you change the text here, the whole application text will be changed.
9. Change App Icons
You can change icons for the application. To change the icons, select res-> drawable -> Right click -> new -> Batch Drawable Importer. To change App Logo, default size is 512 x 512
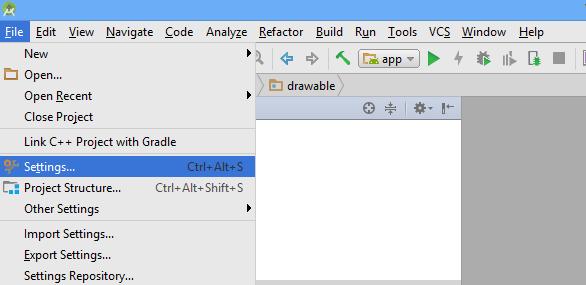
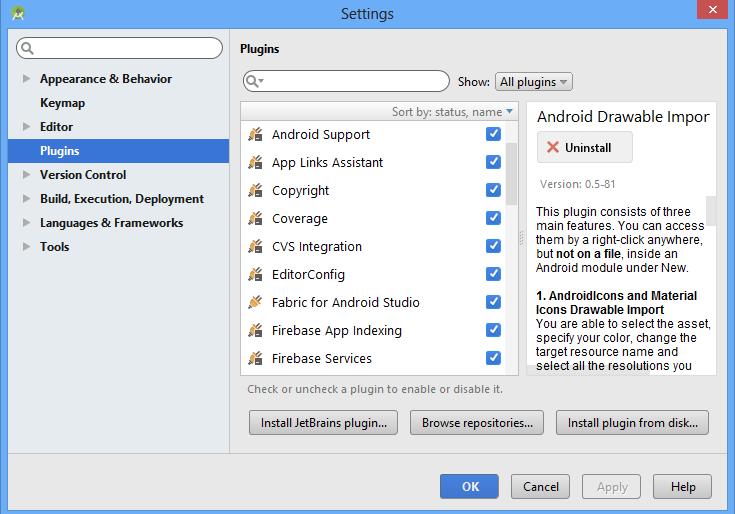
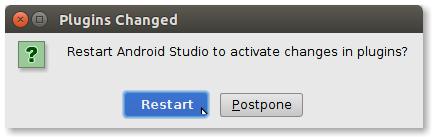
If you don’t have that option, just follow the below steps. Click on File -> Settings -> Plugins -> Browse Repositories -> search Android Drawable importer -> Install plugin. View the images below for clear understanding.
Step 1
Step 2
Step 3
Step 4
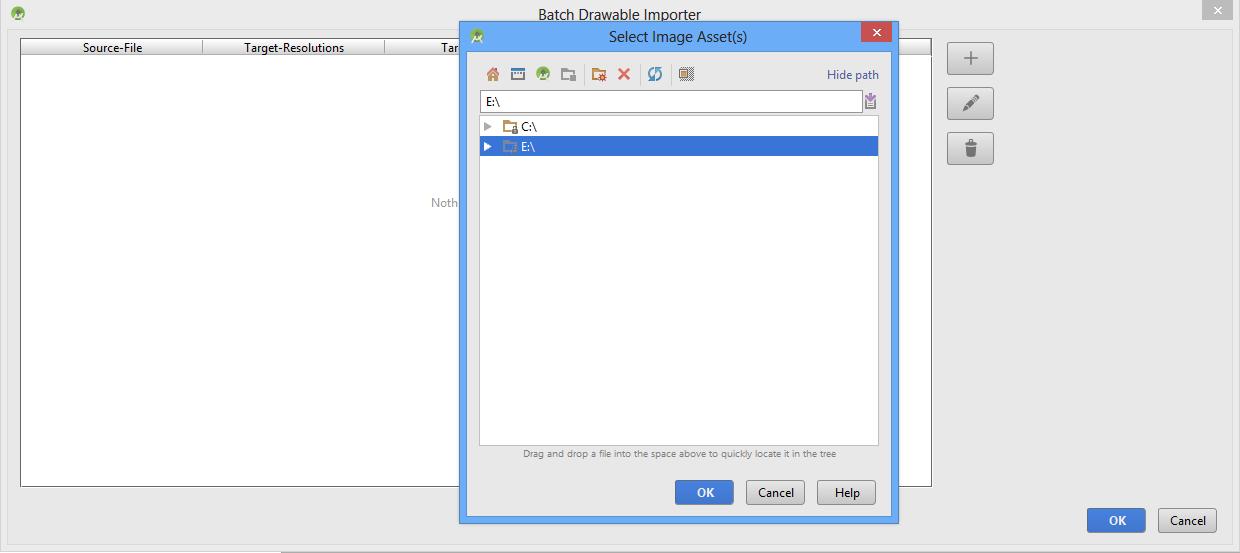
Finally Android Drawable Importer Plugin is installed in android studio. Now click res -> drawable -> New -> Batch Drawable Import.

Click the add button. New tab will be opened and select the image from the directory. And click OK.
In this page you can set Icon name and Target resolution. Based on the image, height and width will be set.
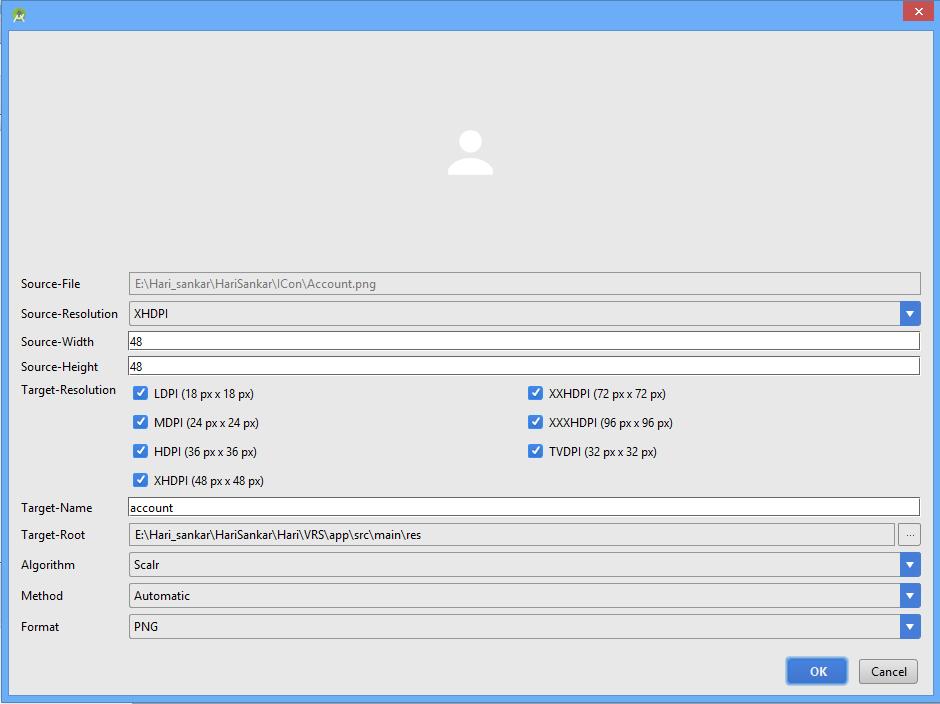
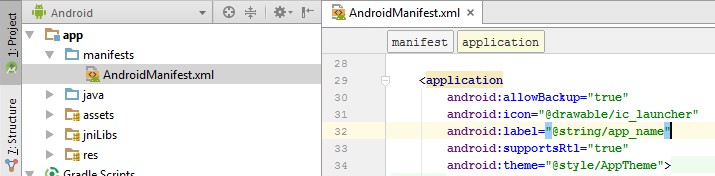
After adding a new icon into the drawable folder, if you wish to change the logo for the app you can change it in manifest.xml file.
10. System Requirements
To run the product, You need the followings
| Operating Systems | Windows, Mac, Linux |
|---|---|
| Software | Android Studio(Latest Version 3.6.2 ),JDK(java 8) |
Prepare to Deploy
To deploy your app to Google Play you need to compile it to .apk file and sign. More details about sign process you can find here:
11. Support
If you have any queries please contact us through email: [email protected]
12. Thank You
Thank you so much for using this template
Dreams Technologies Pvt Ltd.